Before buying your outdoor lighting, be sure you know what you want it for and why. Your choices for a romantic backyard getaway will be different than a kid-friendly playground.
Take a good look at your yard… In fact, sketching it out is a great idea too. Where are there already lights? Where are there walkways? Where do you have ponds, gardens, benches, pools, et cetera? Make sure you note where you have lighting, where you need lighting, and what kind.
Think of it this way… You put all the trouble for getting together an incredible water fountain and pond… So be sure you enhance it with a spotlight, or soft lighting around the perimeter.
We all have a budget, so it’s best to determine yours before you get started. Wiring 120-volt lighting, for example, is a larger process. The lights must be buried at a depth of 18 inches to protect it from water, and a licensed electrician has to install the electrical components.
Alternatively, low-volt landscape lighting only needs an outdoor receptacle and a transformer. In addition, the cables are easier to move, and the only requirement is that the cable has to be hidden in a location out of the way.
The easiest option is solar lighting. No cords make it easy to install, and it just has to be placed so it receives enough light during the day to allow it to shine at night.
High-voltage lighting can be over $100, plus labor.
Low-voltage lighting, done by yourself, can be $30 to $350 per light, so it depends how much you are illuminating.
Solar lighting does not use installation costs, and it also doesn’t cost anything to operate (IE hydro bills), so the initial cost is the only fee. Prices often start as low as $10.
Check out Landscaping Victoria for more articles on making your garden, landscape, home and business looking it’s best.
Image courtesy of www.sonor.co.uk
Plan to get a covered, GFI-protected outdoor outlet. Do not attempt to run the cords out of windows or under doors. This could cause damage, or worse, a fire. The outlet cover will keep it moisture-free, and a ground fault interrupter will automatically shut off power if it gets wet.
To determine how much wattage you can use on your lights, check out the number of amps in each outlet. To do this, check the breaker box, usually found in the basement. Multiply the number of amps by 120, which will give you the maximum wattage a circuit can handle.
For example, a 15-amp circuit can handle lights totaling 1,800 watts and a 20-amp circuit can handle 2,400 watts. Check with an electrician if you live in an older home.
Often, the light package clearly states that a maximum of three light strings should be connected. To go past this, use a splitter. Too many lights will blow a fuse. To use more lights, a splitter divides the power so that more light strings can be used up to the wattage limit. Check out your local landscaping store in Victoria for options.
Chances are you want to make it look good, too. Our advice? Keep it simple. For example, one huge tree, and a few decorations can make it stress-free, with one gorgeous focal point.
Stock up on the right stuff to get the job done. A tall ladder, clips (instead of nails), light-installing guns and more.
Most lights are now LED, which is a great way to be eco-friendly, too. They’ll also save you some serious cash, with less wattage use. By comparison, conventional C9 bulbs use about 10 watts of power to an LED bulb’s 1 watt.
Even better, use timers. That way, you can go to bed, they’ll click off in the evening, and you don’t have to worry about them all season.
Visit Landscaping Victoria for more great ideas!
Image courtesy of santa-wallpapers.com
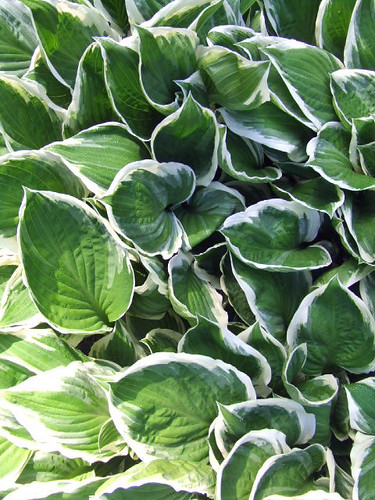
]]>These perennials thrive in partial shade, although some varieties (such as the gold leaf), prefer a little more sun. If you live in an area with a lot of deer, be careful–they love them. Visit a local garden centre and ask for a safe deer repellent.
The aromatic Russian Sage blooms in anything except for extreme climates, with bright colours and needing minimal pruning.
This plant is perfect because, not only is it attractive, but they thrive in dry, poor soil.
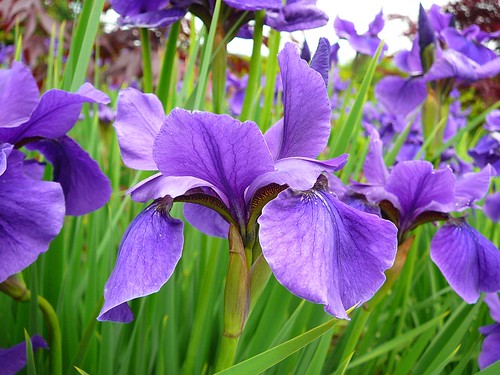
While most irises wilt easily post blooming, this variety stays intact. Coming in blue, white and purple, it’s a rich and elegant touch to your garden.
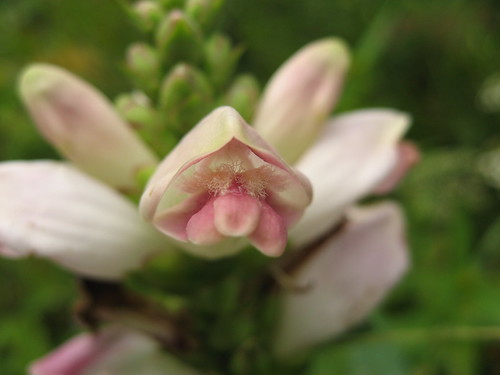
Even in extreme climates, the Turtlehead rages on. It is attractive, blooming a white, red, or rich pink, and will withstand any temperature and weather change.
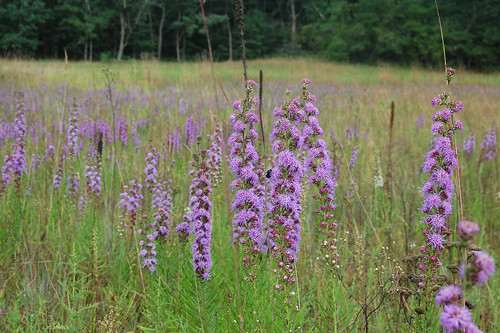
Growing well in all kinds of soil, this purple flower needs no tending at all.
The first step is to figure out where you want to start your garden. It doesn’t have to be in the ground, but growing it there delivers the benefits of organisms, such as earthworms, that help to break down matter into nutrients and aerate your soil and lawn.
Growing from the ground, however, does require a little more effort. In addition to having healthier soil, you need to take the time for prep work and using compost to keep it healthy.
Sometimes, though, our soil just doesn’t cut it. Sand and clay might make a frustrating appearance, and thus, we may turn to a raised bed. Creating a raised bed is easy: use tightly-packed brick or stone to create a perimeter about 16 inches high, then fill the bed with soil and compost.
Container gardening is an option too, best if you only have a small area or live in a condo or apartment. Vegetables and herbs grow well in containers, and you want to make sure that you choose larger ones which have greater reserves of water and food, along with room for the roots to grow. The containers should also have holes for drainage, and you can often pick up your plants pre-potted for convenience.
The best idea? Ask someone who has experience growing in our area. Then, choose seeds or seedlings. Starting with seeds is more difficult, and if cold weather is continuing, you might even have to start them indoors.
If you choose seedlings, you can plant them right into the garden, purchasing them direct from the garden centre (search for organic ones at the Certified Organic Associations of BC website here). (While you’re there, you can drill the folks who work there for info on how to maintain them).
Visit the Garden Path Centre for a wealth of seeds, seedlings and information.
Bear in mind if you’re tight for space: some plants will take over your garden, like squash and melon. Others, like legumes, aide in garden growth by coverting atmospheric nitrogen into a form that crops readily use. You can also add certain flowers such as sunflowers which attract bugs such as ladybugs and beetles, who eat up bugs such as slugs and aphids.
We tend to overwater; most plants only need about an inch of water per week. Shady areas and new plants need a little more TLC, and make sure that you opt for gentle watering cans or hose attachments to keep high-pressure damage at bay.
Mulching is also important. Mulch should be comprised of organic matter, such as grass from cutting your lawn to dead leaves. It slowly decomposes, thus enriching the soil, smothering weeds, assisting with drainage and provide a natural fertilizer. One tip: be sure to spread on top of the soil, not on the plants. (Check out mulch options at Soil Mart).
Start to compost, too. You can learn more from the Greater Victoria Compost Education Centre, a non-profit organization located in Victoria, BC. They provide a wealth of composting and organic gardening education.
Finally, remember to pull out the weeds (and roots) by hand. Sprinkle salt on the ones that grow in between crevices, then top with boiling water.
Thinking of going organic with your lawn and yard? The task isn’t as daunting as it might seem. With a little know-how and a few basic rules under your belt, your lawn will be loving you in no time.
The key to a good lawn is nourishing the soil. Most often we think of feeding our grass, but the focus should be what lay underneath. By starting with the soil using natural and organic products, the result will by immaculately different.
Try organic waste, compost, manure, grass clippings and organic fertilizers.
After mowing your lawn, leave the clippings to lay on the grass. These clippings are the best in fertilizers. Not only are they free and convenient, they are also nutrient-rich and can boost soil fertility by 30%. They shade the lawn, keep it safe from the sun, and help build healthy organisms in your soil.
By taking time to aerate the lawn, you can relieve compaction and cultivate the soil. It increases air penetration and helps water and nutrients reach the roots.
Once per year, make an effort to overseed. This keeps your lawn thick, healthy and dense, aiming to crowd out weeds and cover patches. You can also introduce a variety of grasses – in turn, your lawn will be able to protect itself better.
The best thing you can do for your lawn is learn how to properly mow. And by mowing high, you can shade out weeds that thrive in the sun and encourage optimal root developing. Try mowing at least three inches, keeping it from getting dry and staying cool and moist.
Despite what we may think, lawns only require a maximum of an inch of water per week. And with rain around, that is usually all it needs. The rule of thumb? Water deeply once per week, choose early hours, and don’t overdo it.
]]>Along with these factors is the extended growing season that it delivers. This is especially important for plants that needs earlier yields, and when frost is still hovering around. Because of this, a wider variety of plants and vegetables can be used.
Transplanting is easy, and doesn’t require too much time and effort. Plants are available when you are ready to use them, so you don’t have to wait to visit the local garden centre when you’re ready to start digging.
And because you’re in control, there is less danger of diseased plants or cross contamination between varieties. You’ll get what you want, when you want it, and frankly, they’re just a lot fresher, too.
Tomatoes, eggplant, peppers, cauliflower, onion, broccoli, collard greens, and cabbage are great transplants. You can also start crops you just want to yield earlier, such as watermelon, cantaloupe, squash, and other later bloomers.
Seed flats can be self-made or purchased at a local hardware store or garden centre. With these, you can fit more plants into the same place. However, as they start to grow, you’ll have to transfer them to larger ones before bringing them outside.
Peat pellets are made of peat moss covered in mesh. It expands with water and is combined with soil for ready use. Peat cubes are made of mesh and compressed peat moss, already expanded. Peat pots are made of peat moss and fiber, and must be filled with soil before using.
Once you see the leaves, lift the plants and be careful not to break the roots. Handle it by the leaves, not the stem. Transplant, water carefully, then tend to your garden as per usual.
]]>